

API Rate Limiting with Redis
In this article, we'll explore one of the most important applications of Redis in production: API rate limiting.
Imagine you've built a FastAPI backend for a SaaS application.
Your API has endpoints such as:
POST /auth/login
GET  /products
GET  /users/me
POST /ai/generate
POST /payments
Now imagine one user sends 10,000 requests to your API in one minute.
This can cause:
- Excessive server resource consumption.
- Increased database load.
- High infrastructure costs.
- Slow responses for legitimate users.
- Brute-force login attempts.
- Abuse of expensive AI endpoints.
We need a way to control how frequently clients can call our APIs.
That's exactly what rate limiting does.
By the end of this article, you'll know how to build a reusable Redis-based rate limiter for FastAPI that works across multiple application workers.
1. What is API rate limiting?
API rate limiting is a technique that restricts the number of requests a client can make to an API within a specified time period.
For example:
Maximum: 100 requests
Time window: 60 seconds
This means a client can make up to 100 requests within the applicable 60-second window.
If the client sends request number 101 within that window, the API rejects it temporarily.
The standard HTTP status code is:
429 Too Many Requests
Example response:
{
  "detail": "Rate limit exceeded. Try again later."
}
Real-world analogy
Imagine a bank has one service counter.
The bank decides that each customer can submit only five requests within a particular time period.
This prevents one customer from occupying the counter continuously and gives other customers a fair opportunity.
API rate limiting works similarly.
Rate limiting vs throttling
These terms are related but slightly different:
- Rate limiting: Defines a maximum allowed request rate.
- Throttling: Controls or slows requests when the allowed rate is exceeded.
Some systems use these terms interchangeably.
2. Why do applications need rate limiting?
Let's examine practical use cases.
| API endpoint | Example limit | Reason |
|---|---|---|
| Login | 5 attempts / minute | Reduce brute-force attacks |
| Password reset | 3 attempts / hour | Prevent abuse |
| Public product API | 100 requests / minute | Protect infrastructure |
| Authenticated API | 300 requests / minute | Control account usage |
| AI generation | 10 requests / minute | Control expensive LLM usage |
| Payment API | Business-specific | Prevent abuse and duplicate operations |
These are illustrative limits. Actual limits depend on the application's users, traffic, security requirements, and business model.
Rate limiting protects three important things
1. Infrastructure
Prevents excessive traffic from overwhelming FastAPI, PostgreSQL, and other services.
2. Security
Makes brute-force attempts and automated abuse more difficult.
3. Cost
Especially important for AI applications where each request may invoke an expensive model or external API.
For example, if your AI application charges you for every LLM request, limiting requests per user can help prevent unexpected expenses.
3. Why use Redis for rate limiting?
You might wonder why we need Redis.
Can't we simply maintain a Python variable?
For example:
request_count = 0
Then increment it whenever someone sends a request.
This approach has a serious problem.
Problem: Multiple FastAPI workers
Imagine your application runs four workers:
                Nginx
                  |
          +-------+-------+
          |       |       |
       Worker 1 Worker 2 Worker 3
          |
       Worker 4
Each worker is a separate process with its own memory.
Suppose a client sends 20 requests:
- Worker 1 receives 5.
- Worker 2 receives 5.
- Worker 3 receives 5.
- Worker 4 receives 5.
Each worker might think the client has sent only five requests.
The actual total is 20.
This makes in-memory rate limiting unreliable across workers.
Redis solves this problem
Redis provides shared centralized state.
              FastAPI Application
                       |
             +---------+---------+
             |         |         |
          Worker 1  Worker 2  Worker 3
             |         |         |
             +---------+---------+
                       |
                       v
                      Redis
                       |
                       v
              Shared request counters
All workers access the same Redis counters.
Redis is particularly suitable because:
- Operations are very fast.
- Counters can be incremented atomically.
- Keys can automatically expire.
- Multiple application workers can share the same state.
Key definition: A distributed rate limiter uses shared state so that multiple application instances enforce the same request limit.
4. Understanding rate-limiting algorithms
There are several ways to implement rate limiting.
We'll study four important algorithms:
- Fixed Window Counter.
- Sliding Window Log.
- Sliding Window Counter.
- Token Bucket.
We'll also briefly discuss Leaky Bucket.
4.1 Fixed Window Counter
This is the simplest rate-limiting algorithm.
Suppose our rule is:
Maximum requests: 5
Time window: 60 seconds
Redis maintains a counter for each client.
When a request arrives:
- Increment the counter.
- Set an expiration if this is the first request.
- Check whether the counter exceeds the limit.
- Reject the request if the limit is exceeded.
Example:
Client: user-101
Window: 60 seconds
Limit: 5
Requests:
| Request | Counter | Result |
|---|---|---|
| 1 | 1 | Allowed |
| 2 | 2 | Allowed |
| 3 | 3 | Allowed |
| 4 | 4 | Allowed |
| 5 | 5 | Allowed |
| 6 | 6 | Rejected |
| 7 | 7 | Rejected |
Redis implementation
We can use:
INCR rate:user:101
EXPIRE rate:user:101 60
INCR increments a Redis integer counter.
EXPIRE gives the key a 60-second lifetime.
However, there's an important issue.
If we execute these as two separate operations, another request could arrive between them. We also don't want to reset the TTL every time the counter increments.
A better implementation uses a Lua script to perform the increment and initial expiration atomically.
local current = redis.call("INCR", KEYS[1])

if current == 1 then
    redis.call("EXPIRE", KEYS[1], ARGV[1])
end

return current
The first request creates the counter and expiration.
Subsequent requests increment the existing counter without extending its expiration.
Problem with fixed windows
Consider a 60-second window.
Window 1: 10:00:00 - 10:01:00
Window 2: 10:01:00 - 10:02:00
Suppose a user sends five requests at 10:00:59.
Then they send another five at 10:01:01.
They have sent ten requests in approximately two seconds, even though the configured limit is five per minute.
This is called the fixed-window boundary problem.
Fixed-window limiting is simple and efficient, but it can allow traffic bursts around window boundaries.
4.2 Sliding Window Log
The sliding-window log algorithm tracks individual request timestamps.
Suppose our rule is:
Maximum requests: 5
Time window: 60 seconds
Instead of maintaining one counter, Redis stores request timestamps in a Sorted Set.
Example:
rate:user:101

10:00:05
10:00:12
10:00:19
10:00:31
10:00:42
When a new request arrives:
- Remove timestamps older than the previous 60 seconds.
- Count the remaining requests.
- If the count is below five, add the new request.
- Otherwise, reject it.
Conceptual Redis commands:
ZREMRANGEBYSCORE rate:user:101 -inf <oldest_timestamp>
ZCARD rate:user:101
ZADD rate:user:101 <current_timestamp> <unique_request_id>
The Sorted Set stores:
- Member: Unique request identifier.
- Score: Request timestamp.
Advantage
It accurately tracks requests within a rolling time window.
For example, at 10:00:30, it considers requests from 09:59:30 onward.
Disadvantage
It stores individual request records.
For a high-traffic application, this can consume considerable Redis memory.
We also need to execute the operations atomically, typically using Lua.
4.3 Sliding Window Counter
This algorithm combines fixed-window counters with a weighted estimate from the previous window.
It reduces the boundary problem without storing every individual request timestamp.
Suppose:
Maximum: 100 requests
Window: 60 seconds
At the current time, imagine:
- Previous window count = 80.
- Current window count = 30.
- 25% of the previous window remains relevant.
Estimated request count:
$$80 \times 0.25 + 30 = 50$$
If the limit is 100, the next request is allowed.
The algorithm estimates the number of requests in the current rolling window.
Advantages
- Less memory than a sliding-window log.
- Smoother behavior than a basic fixed window.
- Useful for many public APIs.
Disadvantage
It is an approximation, not an exact record of individual request timestamps.
4.4 Token Bucket
Token Bucket is a popular rate-limiting algorithm.
Imagine a bucket that contains tokens.
Each API request consumes one token.
The bucket has a maximum capacity.
Tokens are replenished over time.
Example:
Bucket capacity: 10 tokens
Refill rate: 1 token per second
Initially:
[10 tokens]
A user sends three requests:
[7 tokens]
After three seconds, three tokens are replenished, assuming the bucket has enough capacity:
[10 tokens]
If the bucket is empty, new requests are rejected until tokens become available.
Advantages
- Allows controlled bursts.
- Provides a predictable average request rate.
- Useful for APIs that should tolerate occasional traffic spikes.
Disadvantage
It requires maintaining token count and the last-refill timestamp, typically with atomic Redis operations.
4.5 Leaky Bucket
The Leaky Bucket algorithm processes requests at a controlled, steady rate.
Imagine water entering a bucket with a small hole.
Requests enter the bucket, but they leave at a controlled speed.
If requests arrive too quickly and the bucket fills up, additional requests are rejected or queued, depending on the implementation.
It is useful when the goal is to smooth traffic rather than simply enforce a request count.
Comparing the algorithms
| Algorithm | Main idea | Important trade-off |
|---|---|---|
| Fixed Window | Count requests in fixed intervals | Can allow boundary bursts |
| Sliding Window Log | Track individual timestamps | Higher memory usage |
| Sliding Window Counter | Estimate rolling request count | Approximate result |
| Token Bucket | Consume and replenish tokens | More complex state management |
| Leaky Bucket | Process at a controlled rate | May require queuing |
Which should we use?
For our first FastAPI implementation, we'll use Fixed Window Counter.
It's easy to understand, efficient, and useful for many ordinary API limits.
Later, you can choose sliding-window or token-bucket approaches when your application's traffic patterns require them.
5. Implementing Redis rate limiting in FastAPI
Now we'll build a reusable rate-limiting service.
We'll use:
- FastAPI.
redis.asyncio.- Redis Lua scripts.
- HTTP 429 responses.
- Client identifiers.
- Automatic expiration.
We'll assume your application already creates a single shared async Redis client (backed by a connection pool) at startup and stores it on app.state.redis.
Step 1: Project structure
Add a rate-limiting service:
fastapi-redis/
│
├── app/
│   ├── main.py
│   │
│   ├── services/
│   │   ├── redis_service.py
│   │   └── rate_limiter.py
│   │
│   ├── dependencies.py
│   │
│   └── routers/
│       ├── products.py
│       ├── users.py
│       └── dashboard.py
│
└── .env
Step 2: Create the rate-limiting service
Create app/services/rate_limiter.py:
from redis.asyncio import Redis
from redis.exceptions import RedisError

FIXED_WINDOW_SCRIPT = """
local current = redis.call("INCR", KEYS[1])

if current == 1 then
    redis.call("EXPIRE", KEYS[1], ARGV[1])
end

local ttl = redis.call("TTL", KEYS[1])

return {current, ttl}
"""


class RateLimiter:
    def __init__(self, redis_client: Redis):
        self.redis = redis_client

    async def is_allowed(
        self,
        key: str,
        limit: int,
        window_seconds: int
    ) -> dict:
        result = await self.redis.eval(
            FIXED_WINDOW_SCRIPT,
            1,
            key,
            window_seconds
        )

        current, ttl = result

        return {
            "allowed": current <= limit,
            "limit": limit,
            "remaining": max(0, limit - current),
            "retry_after": max(0, ttl)
        }
Let's understand this implementation.
A. Lua script
local current = redis.call("INCR", KEYS[1])
Increments the request counter.
if current == 1 then
    redis.call("EXPIRE", KEYS[1], ARGV[1])
end
Only the first request sets the expiration.
local ttl = redis.call("TTL", KEYS[1])
Retrieves the remaining lifetime.
return {current, ttl}
Returns both values to Python.
B. Why Lua?
Without Lua, multiple Redis commands could be interleaved with commands from other clients.
A Lua script executes atomically on Redis.
That means another Redis command cannot interrupt this script while it runs.
This makes the counter increment and initial expiration a single atomic operation.
C. Why return metadata?
The service returns:
{
    "allowed": True,
    "limit": 100,
    "remaining": 95,
    "retry_after": 42
}
The FastAPI application can use this information to decide whether to allow the request and which rate-limit headers to send.
6. Create a reusable FastAPI dependency
We don't want to repeat rate-limiting logic in every route.
Instead, we'll use FastAPI dependencies.
Open app/dependencies.py and add:
from fastapi import Request

from app.services.rate_limiter import RateLimiter


def get_rate_limiter(request: Request) -> RateLimiter:
    redis_client = request.app.state.redis
    return RateLimiter(redis_client)
This creates a small service object that uses the existing application Redis client.
Remember:
Creating a
RateLimiterobject does not create a new Redis connection pool. It reuses the shared client.
7. Apply rate limiting to an API endpoint
Let's protect a public endpoint.
Suppose our product API allows:
100 requests per minute per client
In app/routers/products.py:
from fastapi import (
    APIRouter,
    Depends,
    HTTPException,
    Request
)
from redis.exceptions import RedisError

from app.dependencies import get_rate_limiter
from app.services.rate_limiter import RateLimiter

router = APIRouter(
    prefix="/products",
    tags=["Products"]
)


@router.get("/public")
async def get_public_products(
    request: Request,
    limiter: RateLimiter = Depends(get_rate_limiter)
):
    # Identify the client
    client_ip = (
        request.client.host
        if request.client
        else "unknown"
    )

    # Build Redis key
    rate_key = f"rate:products:{client_ip}"

    try:
        result = await limiter.is_allowed(
            key=rate_key,
            limit=100,
            window_seconds=60
        )
    except RedisError:
        # Rate-limiter failure policy:
        # For this public example, fail closed.
        raise HTTPException(
            status_code=503,
            detail="Rate limiting service unavailable"
        )

    if not result["allowed"]:
        raise HTTPException(
            status_code=429,
            detail="Rate limit exceeded. Try again later.",
            headers={
                "Retry-After": str(
                    result["retry_after"]
                )
            }
        )

    return {
        "message": "Products retrieved successfully"
    }
Understand the request flow
       Incoming Request
               |
               v
       Identify Client IP
               |
               v
        Generate Redis Key
               |
               v
         Increment Counter
               |
               v
        Compare With Limit
               |
          +----+----+
          |         |
        Allowed   Exceeded
          |         |
          v         v
       Execute    HTTP 429
       Endpoint
When a client exceeds the limit, FastAPI returns:
HTTP/1.1 429 Too Many Requests
Retry-After: 42
Example response:
{
    "detail": "Rate limit exceeded. Try again later."
}
Retry-After tells the client how many seconds remain until the fixed-window counter expires.
8. Apply different limits to different endpoints
Not all endpoints have the same cost or security requirements.
For example:
| Endpoint | Example limit |
|---|---|
| Public products | 100/minute |
| User profile | 120/minute |
| Login | 5/minute |
| AI generation | 10/minute |
| Password reset | 3/hour |
We can reuse the same RateLimiter service.
For example, an AI endpoint:
@router.post("/ai/generate")
async def generate_ai_response(
    request: Request,
    limiter: RateLimiter = Depends(get_rate_limiter)
):
    user_id = "101"

    result = await limiter.is_allowed(
        key=f"rate:ai:user:{user_id}",
        limit=10,
        window_seconds=60
    )

    if not result["allowed"]:
        raise HTTPException(
            status_code=429,
            detail="AI request limit exceeded",
            headers={
                "Retry-After": str(
                    result["retry_after"]
                )
            }
        )

    return {
        "message": "AI generation request accepted"
    }
The example uses a placeholder user ID. In a real application, obtain it from your authenticated-user dependency.
This is useful because AI generation may consume paid model tokens or GPU resources.
Rate limiting helps control usage, although you should also implement token quotas, spending limits, and concurrency controls when necessary.
9. Rate limiting by IP address vs authenticated user
There are two common ways to identify clients.
A. IP-based rate limiting
Example:
rate:ip:192.168.1.10
This is useful for:
- Public APIs.
- Login endpoints.
- Unauthenticated routes.
- General abuse protection.
However, multiple users may share one public IP address.
For example, users in a university computer lab may all access your API through the same network.
They could unintentionally share one rate limit.
B. User-based rate limiting
Example:
rate:user:101
This is useful for authenticated users.
Suppose:
User 101 → 100 requests/minute
User 102 → 100 requests/minute
User 103 → 100 requests/minute
Each user gets an independent counter.
C. Tenant-based rate limiting
For SaaS applications, you might also want organization-level limits.
Example:
rate:tenant:company-a
rate:tenant:company-b
This allows different subscription plans to have different limits.
For example:
| Plan | Example API limit |
|---|---|
| Free | 60/minute |
| Pro | 300/minute |
| Enterprise | 1,000/minute |
These limits are illustrative.
Best practice: combine limits
A professional application might enforce:
- IP-based limits for general abuse protection.
- User-based limits for individual accounts.
- Tenant-based limits for subscription quotas.
- Endpoint-specific limits for expensive operations.
For example, an AI generation request might need to pass all three checks:
IP limit
   |
   v
User limit
   |
   v
Tenant quota
   |
   v
AI generation
This protects both infrastructure and business resources.
10. Important production issue: reverse proxies and client IPs
When deploying FastAPI behind Nginx, the request might look like:
Client
  |
  v
Nginx
  |
  v
FastAPI
In this architecture, request.client.host may return the Nginx container or server IP instead of the original client's IP.
Nginx can forward the original IP using headers:
proxy_set_header X-Real-IP $remote_addr;

proxy_set_header X-Forwarded-For $proxy_add_x_forwarded_for;

proxy_set_header X-Forwarded-Proto $scheme;
FastAPI can then obtain the client address from trusted proxy information.
However, never blindly trust X-Forwarded-For from arbitrary clients.
An attacker can send a fake header.
Configure Uvicorn's trusted proxy settings or implement trusted-proxy-aware IP extraction. Only trust forwarded headers from proxies you control.
For example, when starting Uvicorn:
uvicorn app.main:app \
    --proxy-headers \
    --forwarded-allow-ips="127.0.0.1"
The allowed IP must match your actual trusted proxy address or network.
In a Docker deployment, that might be a private proxy address rather than 127.0.0.1.
11. Understanding rate-limit response headers
Professional APIs often communicate rate-limit information through HTTP headers.
Common headers include:
| Header | Meaning |
|---|---|
X-RateLimit-Limit |
Maximum allowed requests |
X-RateLimit-Remaining |
Requests remaining |
X-RateLimit-Reset |
Time when the window resets |
Retry-After |
Seconds until the client should retry |
We can add these headers to our FastAPI response.
For example:
from fastapi.responses import JSONResponse

return JSONResponse(
    content={
        "message": "Products retrieved successfully"
    },
    headers={
        "X-RateLimit-Limit": str(result["limit"]),
        "X-RateLimit-Remaining": str(result["remaining"]),
        "Retry-After": str(result["retry_after"])
    }
)
For rejected requests:
raise HTTPException(
    status_code=429,
    detail="Rate limit exceeded",
    headers={
        "Retry-After": str(result["retry_after"]),
        "X-RateLimit-Limit": str(result["limit"]),
        "X-RateLimit-Remaining": "0"
    }
)
The exact header names and reset semantics should be documented as part of your API contract.
12. Testing the rate limiter
Let's test our implementation.
Start Redis:
docker compose up -d
Start FastAPI:
uvicorn app.main:app --reload
Call the endpoint:
GET http://127.0.0.1:8000/products/public
If the configured limit is 100 requests per minute, the first 100 requests should be accepted within the same fixed window.
The next request should return:
429 Too Many Requests
Inspect Redis
Open Redis CLI:
docker compose exec redis redis-cli
List rate-limit keys:
SCAN 0 MATCH rate:* COUNT 100
Check a specific counter:
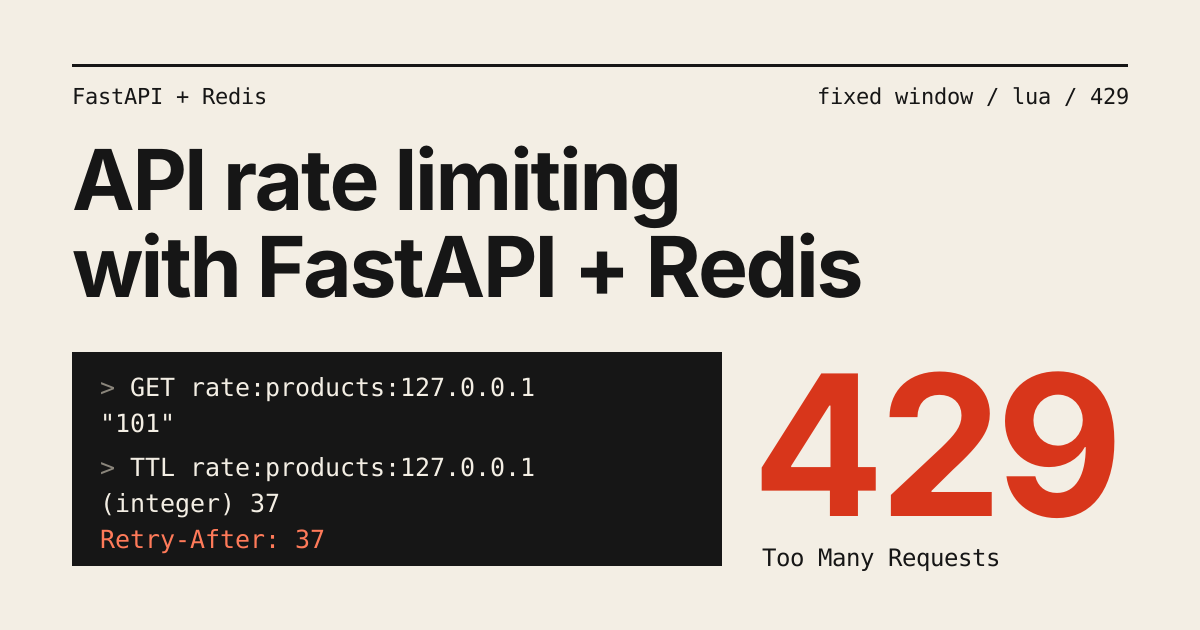
GET rate:products:127.0.0.1
Check its TTL:
TTL rate:products:127.0.0.1
You might see:
100
and:
37
This means the counter is 100 and the fixed window has approximately 37 seconds remaining.
When the TTL reaches zero, Redis removes the counter.
The next request starts a new window.
13. Production considerations and limitations
Our implementation demonstrates the fixed-window approach, but a real production system needs a few more considerations.
A. Fixed-window boundary problem
As we discussed earlier, users can make bursts around window boundaries.
If this matters, consider sliding-window or token-bucket algorithms.
B. Redis failure policy
What happens when Redis becomes unavailable?
There are two common choices:
- Fail open: Allow requests when the rate-limiting service is unavailable.
- Fail closed: Reject requests when the rate-limiting service is unavailable.
Choose according to the endpoint.
| Endpoint | Possible policy |
|---|---|
| Public product listing | Fail open with monitoring |
| Login | Often fail closed or use another protective mechanism |
| Expensive AI generation | Usually fail closed |
| Payment operations | Apply dedicated business controls; don't rely only on rate limiting |
This is a business and security decision, not merely a Redis setting.
C. Redis connection pooling
Use the existing application-level Redis client.
Don't create a new Redis client for every request.
Create the client once at application startup, for example in FastAPI's lifespan handler, and share it across requests so that all of them reuse the same connection pool.
D. Atomicity
Use Lua scripts or another atomic Redis operation pattern.
Avoid incrementing counters and setting their expiration in separate, unprotected operations.
E. Memory management
Rate-limit keys should have expiration.
Otherwise, Redis may accumulate counters for clients that never return.
F. Key design
Use clear prefixes:
rate:ip:...
rate:user:...
rate:tenant:...
rate:ai:...
rate:login:...
Avoid putting passwords, API secrets, or other sensitive information in Redis key names.
G. Don't rely on rate limiting alone for authentication security
For login endpoints, combine rate limiting with:
- Account lockout or progressive delays where appropriate.
- Strong password hashing.
- MFA.
- Credential-stuffing detection.
- Monitoring and alerting.
- Abuse detection.
Rate limiting is one layer of defense, not a complete authentication-security solution.
14. A more complete production architecture
Let's bring the concepts together.
                    Internet
                       |
                       v
                      Nginx
                       |
                       v
                 FastAPI Backend
                       |
                Identify Client
                       |
                       v
                Rate Limit Service
                       |
                       v
                     Redis
                       |
                +------+------+
                |             |
             Allowed        Rejected
                |             |
                v             v
          Application       HTTP 429
             Logic
                |
          +-----+-----+
          |           |
          v           v
       PostgreSQL   External APIs
The rate limiter acts as a protection layer before expensive application operations execute.
Redis stores shared counters, so multiple FastAPI workers can enforce consistent limits.
Comments
Join the discussionNo comments yet. Be the first to comment.